Showing posts with label recipe. Show all posts

Friday, September 30

Vegetable Stuffed Zucchini

It's really hard for me to capture our dinners in an attractive manner. We tend to eat pretty late most nights, closer to 9 or 10pm because that's just how our schedules work out. As such, all the photos I take of dinner are taken in our poorly lit kitchen and they just end up dim and fuzzy most of the time. It doesn't matter how attractive the food looks right in front of me... it never looks as tasty in photos.


Who am I kidding? I'm no food photographer, that's for sure. But I've noticed that the photos I take early in the day always turn out ten times better than the dinner night shots...

But who really has the time to cook dinner at three in the afternoon when the sun is actually out? Or set up an elaborate system of lights just to get proper photos at night? Especially when this is dinner we're talking about! I don't know about you, but I really don't want to wait another 20 minutes to eat something I just spent 20+ minutes making. So instead of taking 50 or so photos like I do when I'm not rushing and my tummy isn't grumbling, I end up taking maybe 15 photos and hope that I get at least one decent one from the group. Most of the time I'm lucky if I get that one.
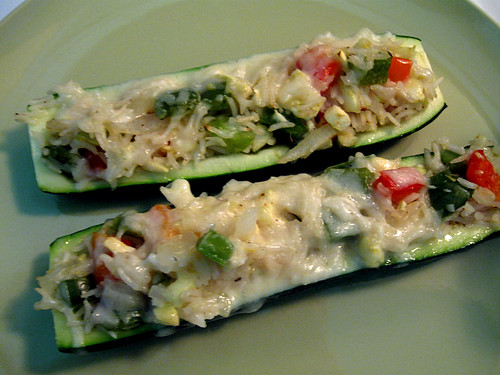

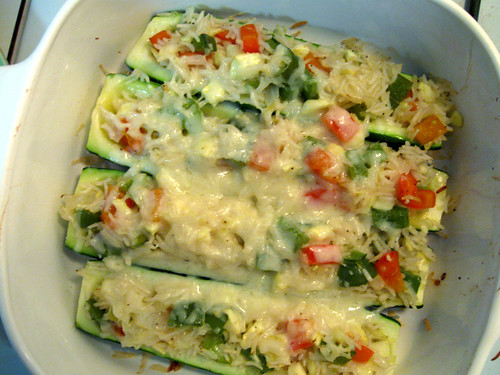
So forgive me if these photos don't make this vegetable stuffed zucchini look as appealing as it really was. Honestly, sometimes I think trying to capture a decent photo of food is way harder than making it. These zucchini 'boats' were simple to put together and didn't need a whole lot of time in the oven - perfection! We filled ours with rice, red and green peppers, and onion. Oh, and we topped them with a gruyere/cheddar mix which might have been the very best part of the whole meal. I kid, of course, but seriously. Oh! Or maybe the best part was that all of these veggies came from the farmer's market! Can I get a heck yeah? Heck Yeah.

Vegetable Stuffed Zucchini

serves 2 people as an entree, 4 people as a side

Ingredients:
2 medium zucchinis
1 small onion
1 cup of sweet peppers
salt & pepper, to taste
paprika & garlic powder, to taste
olive oil
1/2 cup rice, cooked according to package
cheese, to grate (we used a gruyere/cheddar mix)


- Rinse and dry your zucchini, and slice each one in half. Chop off the tops of zucchini if desired.
- Spoon out the zucchini pulp with a spoon (Don't throw it out though!) Once you've made little zucchini 'boats', place them in a casserole dish and brush a little bit of olive oil along each half.
- Chop up the zucchini pulp and set it aside. Dice the onion and peppers and set those aside as well.
- Make your rice according the directions on the bag, and set it aside once it's done.
- In the mean time, heat up some oil in a pan and saute the onions and peppers until they're soft and the onions are beginning to become transparent.
- Combine the zucchini pulp, sauteed onions and peppers. Stir in the cooked rice, and add salt, pepper, paprika, and garlic powder to taste.
- Once everything is well incorporated, spoon the mixture into each of your zucchini 'boats' and top each with some shredded cheese.
- Bake at 350 degrees for 20 - 25 minutes, until the zucchini is tender and easily pierced with a paring knife.
- Gently plate the stuffed zucchini and top with fresh herbs if desired.
- Enjoy!

Sunday, August 21

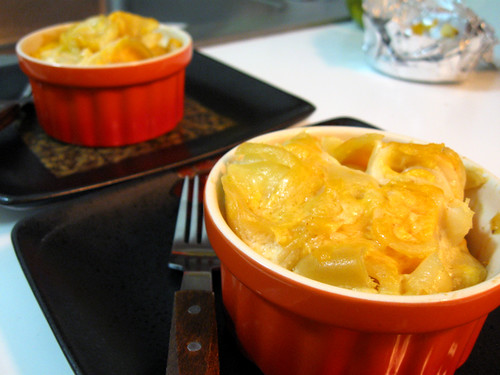
Macaroni and Cheese, please!

Grr. I'm such a bad blogger and I really do need to stop apologizing for my lack of posts. (I'm a busy little bee, what can I say!) What I should apologize for though is not keeping my promise to share an amazing mac n' cheese recipe with you! I shared pictures of it and then let two three weeks go by while you probably sat there drooling and clicking the refresh button in your browser... alright, I'll admit, I've made some much more drool-worthy things before (like these s'mores brownies) but I swear this mac n' cheese is worth it.

It's super duper easy to make, seriously. The hardest part is waiting!


Mac N' Cheese

adapted from Taylor Takes a Taste

Ingredients:
1-pound pasta of your choice
salt and pepper to your taste
2 1/2 cups sharp cheddar
1 tablespoon all-purpose flour
1 teaspoon mustard
1/4 teaspoon cayenne pepper
1/4 teaspoon paprika
1/4 teaspoon nutmeg
1/3 cup sour cream
1 egg, beaten
1 small onion, chopped
1/2 cup milk
1 cup heavy cream
1/2 teaspoon worcestire sauce

- Preheat your oven to 350°F.
- Cook the pasta according to the package, then combine it with 1 1/2 cups of cheese in a 9x9 inch baking dish.
- In a large bowl, combine all of the other ingredients and whisk them until combined. Pour the mixture over the pasta, making sure everything is well-coated. Top everything off with another cup of cheese.
- Bake for 30 - 35 minutes, or until the top is golden. Let the macaroni and cheese sit for at least 10 minutes before serving it, so that it has time to set as it cools.
- Enjoy!
Tuesday, May 24

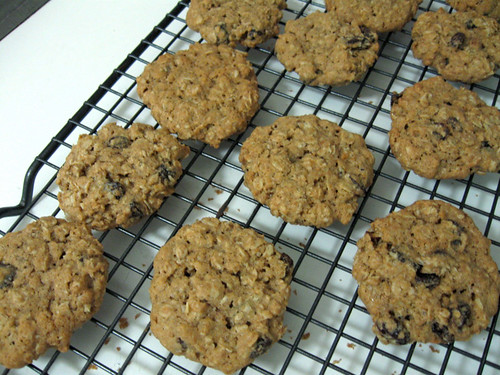
Chewy Oatmeal Raisin Cookies

At work we recently started carrying some gluten-free muffins from a local gluten-free bakery. Before we decided to order, the baker gave us a few samples of various baked goods to try. Lets just say, it was very impressive. The coffee cake melts on your tongue and the muffins are moist and sweet like you wouldn't expect. What really made my mouth water were the oatmeal raisin cookies - they were chewy yet crunchy and they contained the perfect amount of raisins, with a light hint of cinnamon. Absolutely delicious!

After thinking about chewy delicious oatmeal cookies every day since, I finally came up with my own. Here is my very non-gluten-free recipe for chewy oatmeal raisin cookies:


Chewy Oatmeal Raisin Cookies

1/2 cup all-purpose flour
1/2 cup whole wheat flour
1/2 teaspoon cinnamon
1/2 teaspoon baking soda
1/2 teaspoon salt
2 cups rolled oats
1 cup raisins
10 tablespoons butter
1 cup brown sugar
1 egg
1/2 teaspoon vanilla extract

- Preheat the oven to 350 degrees.
- In a small bowl combine both flours, cinnamon, baking soda, and salt.
- In the bowl of your stand mixer beat the butter and brown sugar together.
- Add the egg and vanilla extract to the butter/sugar mixture and beat until combined.
- Slowly add the dry ingredients in, followed by the oats and raisins.
- Using a spoon or a cookie scoop if you have one, place balls of dough 1" apart onto your cookie sheet and flatten them down with your fingers.
- Bake the cookies 12 - 15 minutes, until the edges are golden brown.
- Let them cool on the cookie sheet for at least 5 minutes before moving them to a cooling rack to cool completely.
- Enjoy!


Tuesday, May 3

Netflix Lovin' & Sweet Treats

In case you haven't quite figured it out yet, we're huge fans of Netflix over here. Which is kind of ironic, actually, considering the fact that when Shawn and I first met he was working at the local video store and he absolutely abhorred the thought of Netflix, whereas I was preaching about Netflix to everyone who would listen (way before they even started their amazing Instant Queue feature... my parents were early-Netflix customers). It just goes to show you how opinions can change as you grow (...and how the need for things like video stores dies out after a while).

Netflix is by no means sponsoring us or this post (but they totally should!), so the real question is - why are we such big fans? When we moved out here a year ago and did our cable company research, we just couldn't bear the thought of spending $100+ a month just to watch tv whenever we wanted (especially considering Comcast is the primary option out here - we've vented about them before though, so I'll spare you those details). Cable-less but in need of some visual entertainment, we opted for a Netflix subscription instead. At under $11 a month for one unlimited movie 'rental' at a time and unlimited access to the thousands of movies and tv shows in their Instant Queue 24/7, we would have been crazy to pick anything else.

So what if we can't watch 'real' tv? The only good thing on tv these days is Wayne Brady on Lets Make a Deal anyway!


We'd make deals with Wayne all day if he wanted us to...

But that's enough 'real' tv jazz - back to the Netflix love. They must really love us because they have all of our new & old favorite tv series on the Instant Queue:

* That 70s Show
* Futurama
* The Twilight Zone
* Scrubs
* 3rd Rock From The Sun
* 30 Rock
* Dexter (unfortunately only seasons 1 & 2 so no spoilers, please!)

...and our newest favorite series of all: PSYCH.


Shawn Spencer, Burton Guster, and the occasional pineapple.

Yes, we're a few years late on yet another bandwagon, shush. The show is hilarious. And smartly done. The episodes are an hour long, too, so that's always a plus for us. The main reason we watch it though is because the main character - Shawn Spencer - has such striking similarity to Shawn... it's uncanny. The personality traits are almost spot on and they even got his physical appearance right:


Shawn = Shawn?

...Shawn even has a button down shirt in that same pattern and colors. Strange. We're still trying to figure out how they got a hold of all of Shawn's shirts, thoughts and quirks.

But enough about that; now that I've proclaimed our love for Netflix and our new favorite (old) show, lets get into food mode.


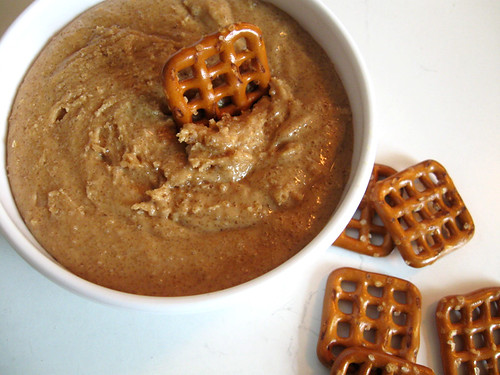
Remember this peanut butter 'dip'? Did you know that it's not really a dip, it's actually a filling for something sweetly addictive? Check this out:


Pretzel peanut butter chocolate dipped yumminess!

Chocolate Peanut Butter Pretzel Bites


Ingredients:
1 cup creamy peanut butter
2 tablespoons butter, softened
1/2 cup powdered sugar
3/4 cup brown sugar
a bag of hard pretzels
4oz dark chocolate

To Make:
- In the medium bowl with a spatula or in the bowl of a stand mixer, beat the peanut butter and butter until combined.
- Scrape down the bowl, add sugars and beat until combined. You should be able to roll the mixture into balls without it sticking to your hands. If the dough is too sticky, add more powdered sugar until you reach a consistency that is easy to roll.
- Roll the peanut butter mixture into small balls, about 1 teaspoon of mixture for each ball, and place on a parchment-lined baking sheet.
- Sandwich the balls between two pretzels and place in the freezer for 30 minutes.
- Melt the chocolate in a metal bowl over a pan of lightly simmering water. Stir occasionally until smooth, and remove from heat.
- Dip each pretzel bite halfway into the melted chocolate and place on the prepared baking sheet. Chill in refrigerator until chocolate is set.
- Enjoy at your leisure! These keep best in the refrigerator or freezer.

Careful, they may be addictive. I should add, it's a quick and easy recipe that makes a great snack while you're getting comfortable on the couch watching Psych... or whatever your pleasure is. If you dig peanut butter as much as we do over here, you'll thank me for this one.

Monday, March 7

Good Ole Granola

Lets start this week off on a lighter note, with deep breaths and clear nostrils, in spite of last week. And in my opinion, there's no better start to a morning than a big bowl of granola with a little bit of plain yogurt and honey thrown in....


Granola is super easy to make - it's just a combination of dry ingredients with a smaller percentage of sweet, wet ingredients. In the pastry kitchen I worked at, I learned the basic granola equation.

Ok, lets back-track a little - even though I've been actively baking for 3+ years now, it wasn't until last year that I really started messing around with the math aspect of baking and understanding the science behind everything. Just as is true of any equation, you need to understand the basic elements before you can start switching things around... I've only recently begun switching up ratios in recipes instead of just switching out ingredients. It's been a lot of fun and although my 'experiments' don't always turn out as planned, they're at least still edible and I'm learning new things in the process! Anyways, back to the granola equation. About a year ago the pastry chef I was working for broke down granola for me into four parts and percentages... bear with me here.

First, you have your dry ingredients. These should comprise of:

50% rolled oats and 50% combination of other dry ingredients

...including but certainly not limited to: cereals (puffed rice is common), nuts, seeds, shredded coconut, and of course some sort of brown or natural sugar if you're so inclined.

Now, the dry ingredients only make up one portion of the granola equation. You also have to add some wet ingredients in there - those are what make everything brown and crisp up so nicely. Your wet ingredients should comprise of:

50% oil and 50% liquid sugar

For oil it's generally preferable to use a neutral-flavored oil such as: canola, safflower, or vegetable oil. And liquid sugar would be anything sweet but not dry, try: maple syrup, molasses, honey, agave nectar, apple sauce... something of those sorts. (I think peanut butter technically counts as a 'liquid sugar' too.)

Still with me? There's one more part to this equation - how much of the dry ingredients do you use and how much of the wet ingredients do you use? A good standard to go by is:

5 cups of dry ingredients to 1 cup of wet ingredients


So if you really want to break it down, your granola should be:

40% rolled oats
40% other dry ingredients/mix-ins
10% oil
10% liquid sugar
___________________
100% granola


Also, keep in mind that mix-ins like nuts and coconut can be baked, but things like dried fruit and chocolate should only be mixed into the granola once it's been baked and cooled completely... otherwise, you'll just have a huge mess on your sheet pan, and no one hates a mess more than me! (I'm not kidding - ask my family and coworkers... I'm super obsessive compulsive when it comes to my kitchen space.)


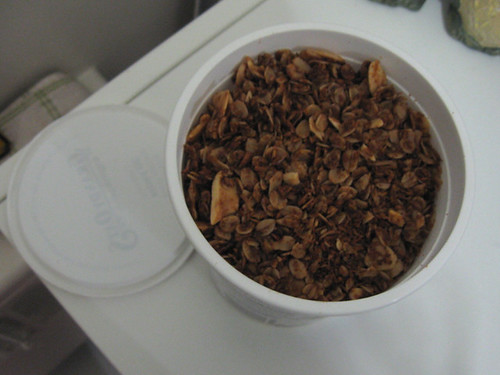
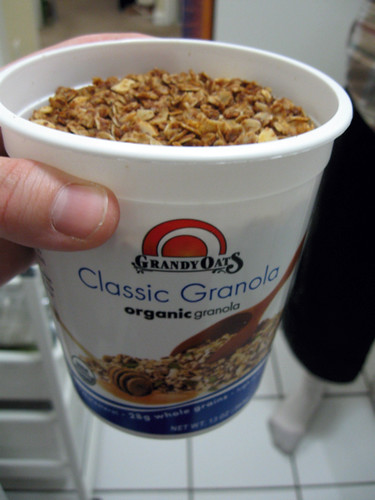
I store my homemade granola in an re-used store bought granola container! It just makes sense.


So there you have it! Was that too much to take in for some simple granola? It makes sense to me, so I hope I explained it in a way that makes sense to you too. Granola is so versatile! But if you don't want to think about it as much as I do, here's the recipe for the granola I made myself last week - keep in mind that it's not overly sweet because I like to sweeten my granola as-needed, so add a little extra brown sugar if you have a sweet tooth.

Basic Granola


Ingredients:
3 cups rolled oats
1 cup shredded coconut
1 cup sliced almonds
2 tablespoons ground flaxseed
1 tablespoon brown sugar

1 tablespoon agave nectar
2 tablespoons honey
2 tablespoons peanut butter
5 tablespoons canola oil

1/2 cup raisins

- Heat your oven to 300 degrees Fahrenheit.
- Mix your dry ingredients together in a large bowl and mix your wet ingredients in a separate small bowl.
- Stir the wet ingredients into the dry until everything is well coated and combined.
- Spread the mixture out onto a sheet pan and bake for about 35 - 40 minutes, or until everything is nicely golden and mostly dry. (Sidenote: I also stir my granola around with a spatula every ten minutes or so to ensure even baking.)
- Let your granola cool completely before mixing in any dried fruit or chocolate. Store your granola in an airtight container and it should keep for a while! Mine doesn't last very long though because I like to snack :)

Monday, February 28

Oatmeal Chocolate Chip Cookies

Since I make my money making pastries and interacting with customers over coffee, I get a lot of questions about the yummy baked things I make. But there's one question I hear more often than others: "How do you keep yourself from eating everything you make?" The answer is simple... when it comes to pastries, I have one weakness: cookies.

Indulgence in things like decadent cakes, pies, brownies aside, there is just nothing better than a freshly baked, still warm from the oven, ooey, gooey, chocolate chip cookie. I love making cookies because they're so versatile... you can tweak each ingredient for a varied effect and texture. One day I'd like to open up a bakery in a cozy place where we only serve cookies straight out of the oven... the only way they should be served.

These oatmeal cookies are a take on my beloved chocolate chip cookies - with a little extra brown sugar for some chew, and some oats and cereal for a little crunch.

Yummy!


Oatmeal Chocolate Chip Cookies


Ingredients:
1 1/4 cups flour
1/2 cup rolled oats
1/2 teaspoon baking soda
1/4 teaspoon salt

1/2 cup unsalted butter
1/2 cup sugar
3/4 cup brown sugar

1 egg
1/2 teaspoon vanilla extract

1/2 cup chocolate chunks
1/4 cup corn flakes

- Preheat your oven to 325 degrees Fahrenheit.
- Beat together the butter and both sugars until light in color and creamy in texture.
- Add in the egg and vanilla and beat until smooth.
- Mix all of the dry ingredients together in a separate bowl and then add them to the wet ingredients slowly, until combined.
- Add in the chocolate chunks and corn flakes, plus any other ingredients you have around (suggestions: coconut flakes, nuts, dried fruit, other cereals... be creative!).
- Scoop the dough out onto your cookie sheet and bake for about 17 minutes, or until the tops look cracked and golden.
- Enjoy!



Wednesday, February 23

The Real Double-Stuff

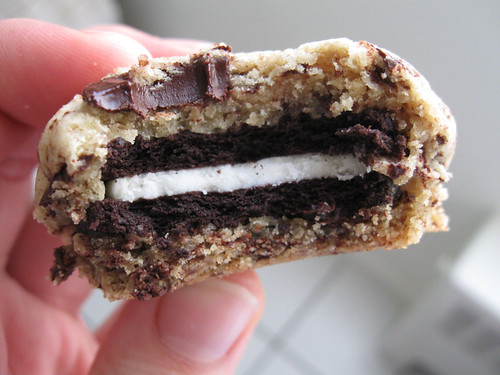
Remember the other day when I teased you with this picture?


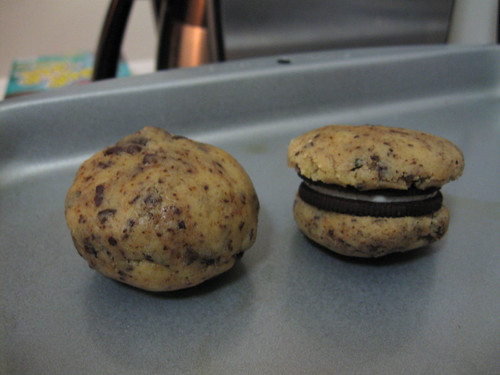
Well today I'll be nice and share the recipe with you. I don't think I need to say much about these cookies, I mean, it's an oreo-stuffed chocolate chip cookie, what more is there really to say?

'Oreo' Stuffed Chocolate Chip Cookies


Ingredients:
1 stick of butter, at room temperature
1/2 cup of sugar
3/4 cup of brown sugar

2 eggs
1/2 teaspoon vanilla extract

1 1/2 cups of all-purpose flour
1/2 teaspoon baking soda
1/4 teaspoon salt

1/2 cup of finely chopped chocolate (mini chocolate chips would also work well)
12-15 oreos, or similar sandwich cookie varieties.


- Preheat your oven to 350 degrees.
- Cream the butter and sugars together until smooth.
- Add the eggs one at a time until incorporated, then the vanilla extract.
- Combine the flour, baking soda, and salt in a separate bowl, then add all these dry ingredients to your wet ones until thoroughly combined.
- Stir in the chocolate chips, then form your dough into balls. I use my cookie scoop to make sure they're even, but you can use a spoon and your eyes to make balls that are about 1 tablespoon in size. Once you have all of your cookie dough balled-up, the fun starts!
- Take an oreo and use two balls of cookie dough to cover it; the best method I found was to put one ball of dough on top of the oreo and one on the bottom, then gently flatten everything between your palms and work/mold the dough down around the oreo cookie. After doing a few of them I felt like I was working with play-doh... and you really can treat it as such! Just work the dough around the cookie however you need to make sure the oreo is fully covered.
- Arrange your super cookies about an inch apart on your cookie sheet and bake them for 16 minutes, or until the cookie dough is golden brown and cracked on top.
- Let the cookies cool on the sheet pan until you deem them solid enough to move to a cooling rack, then let them cool completely. These cookies taste great warm, but they taste even better if you have the patience to let them cool down completely. (The oreos are more intact once the cookie is completely cool!)
- Enjoy!

Super Cookie: deconstructed


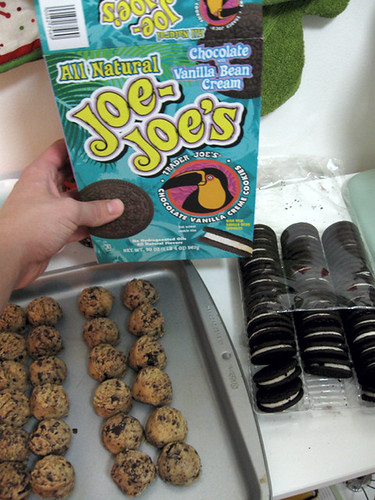
If anyone's curious, I used Trader Joes' Joe Joes instead of Oreos. But I'm sure you're not surprised.

Saturday, February 5

Liz Lemon Loaf


Props to you if you get the reference in the title... this loaf has nothing to do with Liz Lemon, we've just watched a lot of episodes of 30 Rock the last few weeks and Shawn thought it'd be funny.

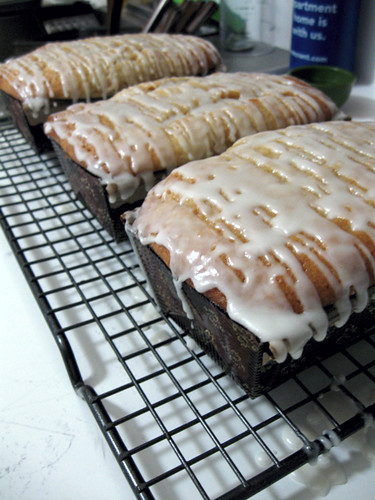
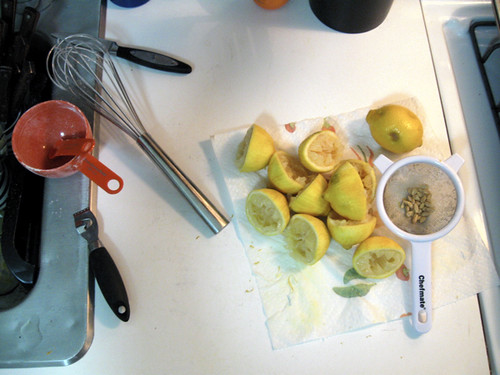
So without further ado, here's the recipe for the lemon loaf I've grown so fond of the past few weeks. It's really just a scaled down extra-lemon version of Deb from Smitten Kitchen's lemon cake, with a few little tricks to add even more lemon flavor. Enjoy!



Lemon Loaf

Adapted from Smitten Kitchen

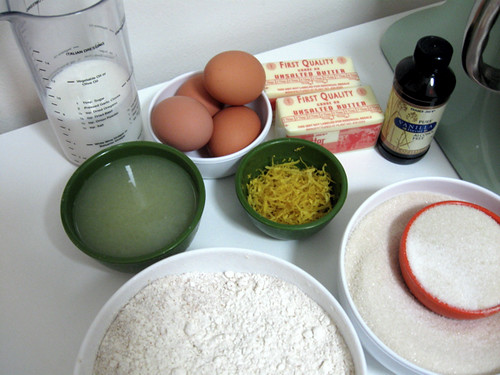
Ingredients:
1 stick unsalted butter, room temperature
1 1/4 cups sugar, separated
2 large eggs
1/6 cup grated lemon zest (approximately 4 large lemons)

1 1/2 cups all-purpose flour
1/4 teaspoon baking powder
1/4 teaspoon baking soda
1/2 teaspoon salt

1/4 cup plus 1/8 cup lemon juice, separated
1/4 cup plus 1 tablespoon buttermilk
1/2 teaspoon vanilla extract

1 cup confectioner's sugar, sifted
2 tablespoons lemon juice

- Preheat oven to 350 degrees and grease and flour one 8x4 inch loaf pan.
- Cream butter and 1 cup sugar in the bowl of an electric mixer fitted with a paddle attachment until the mixture is light and fluffy.
- Add in the eggs, one at a time, and then the lemon zest.
- Combine the flour, baking powder, baking soda and salt in a bowl.
- In another bowl, combine 1/8 cup lemon juice with the buttermilk and vanilla.
- Add the flour and buttermilk mixtures alternately to butter and sugar mixture, beginning and ending with the dry ingredients.
- Pour the batter into your prepared pan and bake for approximately 1 hour, until a toothpick comes out clean.
- Combine 1/4 cup sugar with 1/4 cup lemon juice in a small saucepan, and cook over low heat until sugar dissolves into a syrup.
- Let the loaf cool 10 minutes before inverting it onto a rack set over a tray, then prick the loaf all over with a toothpick and pour the lemon syrup over the loaf - it will drip down into the tiny holes and make your loaf nice and moist. Then let the loaf cool down completely before glazing it.
- To make the glaze, whisk together the confectioner's sugar and 2 tablespoons of lemon juice until smooth. Pour the glaze over the cooled loaf and let set before enjoying.


Thursday, January 27

Peanut Butter & Honey Cookies

Two recipes in one week??!! This is a new one for us. But I promised you at least one a week for the remainder of the year, and I didn't hold up my end of the deal last week, so now you get two this week!


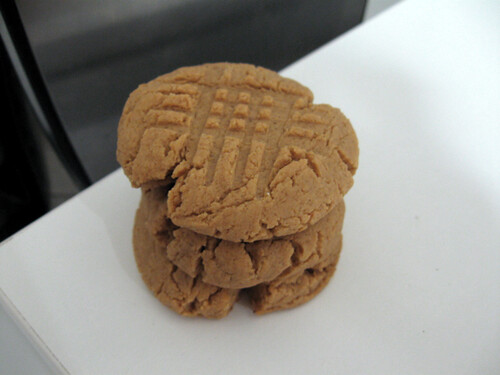
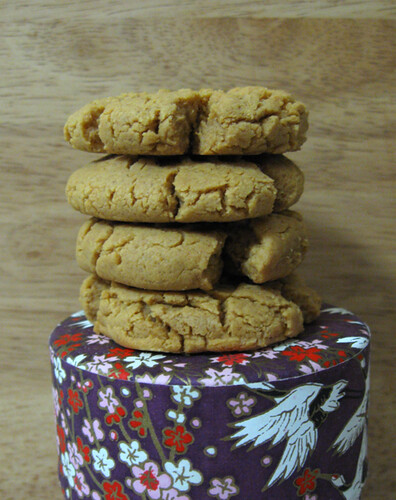
Remember that peanut flour I bought back in October? Well, after one or two attempts at incorporating it into my chocolate chip cookie recipe, the bag just sat on the shelf for a while. So the other day after stumbling upon it again I decided to come up with a cookie recipe that would highlight the flour in all of it's peanutty glory. These cookies were soft but not crumbly and not overwhelmingly sweet... exactly what I was looking for.


Peanut Butter & Honey Cookies


Ingredients:
1 cup peanut flour
1/2 cup all-purpose flour
1/2 teaspoon baking soda
1/4 teaspoon salt

6 tablespoons unsalted butter
2 tablespoons peanut butter
1/2 cup sugar
1/8 cup honey

1 egg
1/2 teaspoon vanilla extract

- Preheat the oven to 350 degrees.
- Combine both flours, baking soda, and salt in a small bowl and set aside.
- In a large bowl, beat together the butter, peanut butter, sugar, and honey.
- One the mixture is smooth, beat in the egg and vanilla extract.
- Then mix the dry ingredients in slowly.
- Form the dough into balls and then squash them down into discs, press them with a fork if desired.
- Set cookies about 1" apart on a cookie sheet (these don't really spread, so you can keep them close to each other) and bake them for 10 minutes, or until their bottoms are a nice golden color.
- Let them cool for a few minutes before transferring them to a cooling rack.

Wednesday, January 26

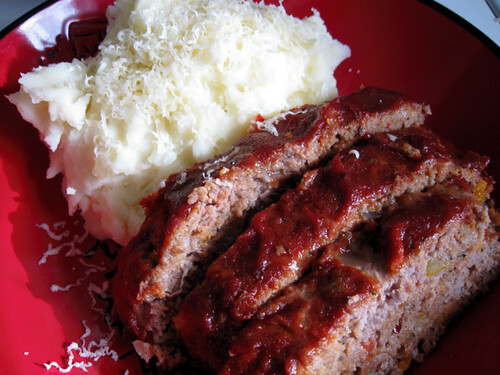
An (I've Made Some) Meatloaf Recipe!

Shawn has made meatloaf three times now, and if I may use a cliche term, the third time is definitely the charm. The first loaf was made with a mixture of ground turkey and beef, and although tasty, we didn't like the lean-ness of the turkey meat... it didn't hold up well in a meatloaf. The second loaf was all beef - that one was tasty too, but something was still missing. So when we stumbled upon a 'meatloaf mix' of ground beef, veal, and pork at our local farmer's market meat counter, we just couldn't resist.

We bought two pounds of meat with the intention of making burger patties with one pound and a meatloaf with the other pound... but that idea went out the window once we got home and decided that we'd rather just make one giant meatloaf and have leftovers to hold us over for the week.

And so, the spicy pepper & onion meatloaf was born.


Meatloaf


Ingredients:
1 cup of chopped sweet onion
1 cup of chopped bell peppers (we used red and yellow)
3 tablespoons butter
2 pounds ground meat (we used a mix of beef, pork and veal)
2 eggs
1 tablespoon ketchup
1 tablespoon mustard
1/2 tablespoon crushed garlic
1 tablespoon worcheshire sauce
a squirt of chili pepper sauce
about 1/8 cup combined spices of your choice (we used dried basil, parsley, red pepper flakes, paprika, salt, and pepper)
3/4 cups bread crumbs

- Prepare all of your ingredients before you start anything. (It's just easier and makes putting the loaf together go much quicker.)
- Sweat the onions and peppers with the butter in a frying pan, you want to get them juicy so they add more flavor to the loaf.
- In a large mixing bowl, combine your choice of spices with 2 eggs, ketchup, mustard, crushed garlic, worcheshire sauce, and chili pepper sauce. Once everything is well combined, mix in your meat, onions and peppers, and then the breadcrumbs.
- Shape your loaf - we bake ours on a cookie sheet, you can also bake it in a loaf pan if desired.
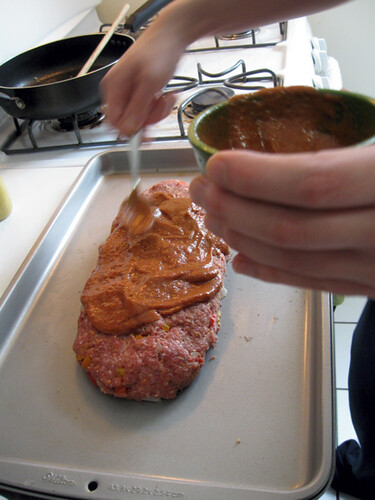
- Glaze the loaf - it's what keeps it moist! Shawn used a mixture of ketchup, mustard, salt, and worcheshire sauce which he kinda painted onto the loaf.
- Bake it at 350 degrees until it's done! (for us that was 25 minutes, pull it out for a re-glaze, and then bake for another 25 minutes).


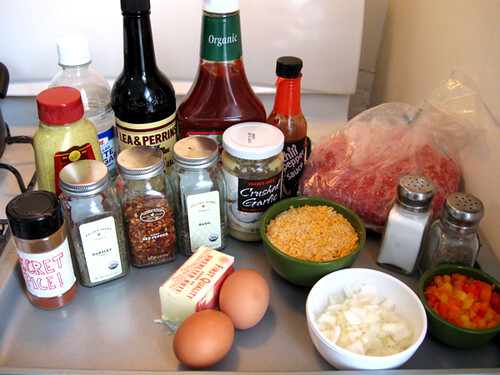
All the ingredients you'll need.


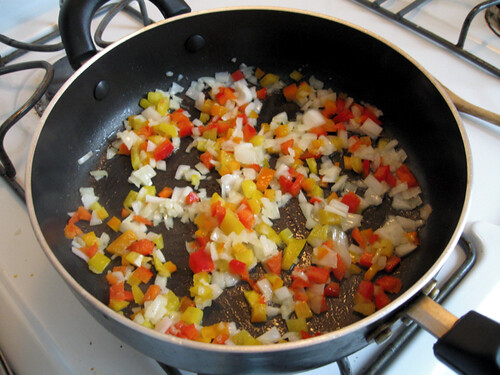
Sweat your peppers and onions.


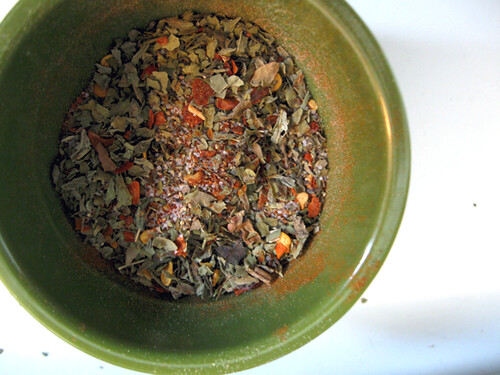
Mix your spices together.


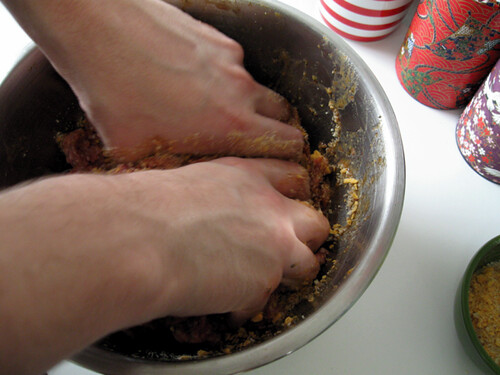
Mix mix mix.


Make your glaze.


Glaze it up!


P.S. Any other ATHF fans think our 'meatball' looks like meatwad? :)


Here's the recipe for the buttermilk mashed potatoes pictured above too:

Buttermilk Mashed Potatoes


Ingredients:
1 1/2 pounds russet potatoes
1/2 cup buttermilk
2 tablespoons butter
salt and pepper

- Boil the potatoes until tender, about 15 minutes or so.
- Mash up the potatoes and stir in the butter and buttermilk; you can add more or less buttermilk depending on the consistency you're looking for.
- Season to taste.

Thursday, December 9

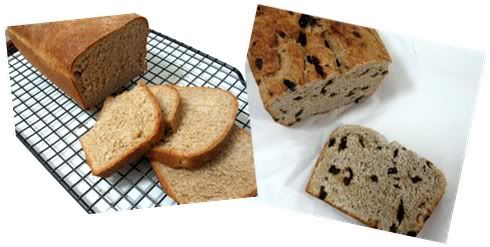
Whole Wheat Bread


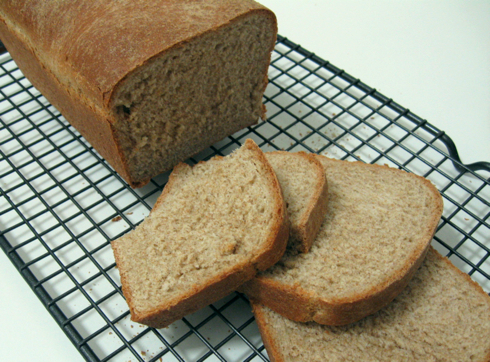
This is my go-to bread recipe since I first discovered it back in October. I thought I had already posted this recipe, but apparently, I had not! So here it is, in all it's glory. Making bread isn't quite a difficult task so much as a patience-testing one. It's worth all the waiting though - homemade bread is always worth the wait.

Whole Wheat Bread

This recipe makes two 8-inch loaves.

1 package of active dry yeast
1/4 cup of warm water (not hot water!)

Combine the yeast and the water, stir the yeast up to make sure it dissolves, then set the mixture aside while you get your other ingredients ready.

1 1/2 cup hot water
1/3 cup brown sugar
2 teaspoons salt
3 tablespoons butter

Combine all of these ingredients in a large bowl and let the mixture cool to lukewarm.
Once the mixture has cooled, mix in:

2 cups whole wheat flour
1 cup bread flour

Once the flours are incorporated, add the yeast mixture and continue to add more bread flour until the dough becomes stiff but pliable.
Knead the dough on a lightly floured surface until it's smooth and elastic, about 10 minutes or so.
Form the dough into a ball and place it into a lightly greased bowl, cover the bowl with a kitchen towel and let it rest in a warm room for about an hour and a half, or until it has doubled in volume.
Then, take the proofed dough out of the bowl and punch it down, cut it in half, then ball up each half and cover with the kitchen towel again to rest for 10 minutes.
Shape each ball of dough into a loaf and place in greased loaf pans, then let them rise for about an hour and a half, until they've doubled in size again.
Bake the loaves at 375 degrees for about 40 minutes, or until the loaves sound hollow when they're tapped. Take the baked loaves out of the pans and let them cool down completely on a rack.
Enjoy with cheese, jam, peanut butter, nutella... whatever you fancy!
Thursday, November 25

Recipes of the Future

Albeit having a nicely sized collection of both savory and sweet cookbooks, I usually end up searching for most of my recipes online (I use my cookbooks primarily for a few staple recipes I've grown fond of over the years). I'm a huge fan of visiting Tastespotting.com when in search of a specific recipe or ingredient, or even for just a little inspiration on a dull day. But I have a habit of bookmarking potential recipes in my browser... and then never looking at them again. After a while, the bookmarks accumulate and I'm left with so many to go through that I lose interest in them all-together.

But not this time. No, this time, I stopped myself before it got too out of hand. I took all those bookmarks, and I made them into a list. A list of recipes I'd like to get around to making eventually...


Sweet...
Chocolate Opera Cake
Espresso Chiffon Cake w/ Fudge Frosting
S'more Cakes
This amazing Lemon Chocolate Praline Cake
Buckeye Cake
Idle Hand Bars
Glazed Doughnuts
Mocha Buttercream
Lemon Meringue Cake

Savory...
Cornmeal Parmesan Crackers
Parmesan Thyme Crackers
5-ingredient Harissa

Doughy...
English Muffins
Challah Bread
Braided Lemon Bread
Bialys
Oatmeal Sandwich Bread
Chocolate Bread

(All those breads look lovely, however, I recently bought myself a much wanted copy of The Bread Bible, so I think I'll be referring primarily to that for most yeast recipes from now on...)


Oh, and of course... butter! The best ingredient ever.
Now, here's hoping I can form a new habit and just add to this list instead of adding to my bookmarks!


Thursday, September 23

Super Chocolate Cookies


Shawn and I spent most of Monday in the kitchen. While he worked on a huge batch of pasta sauce I made a whole bunch of cookies!


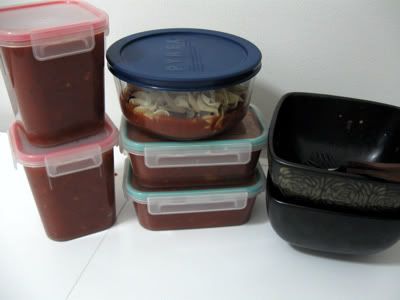
Look at all that sauce! Some in the freezer, some in the fridge, and if you can't tell from the empty bowls on the right, some in our bellies too.


But back to cookies! First I baked off a batch of our favorite chocolate chip cookies and then got started on a batch of our other favorite cookies, super chocolatey cookie goodness... the ultimate chocolate cookie. And today, you are going to love me, because I'm about to share the recipe with you.


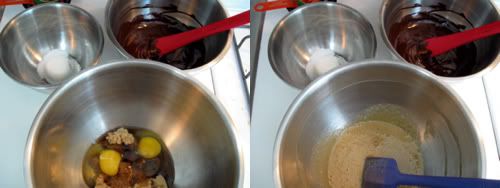
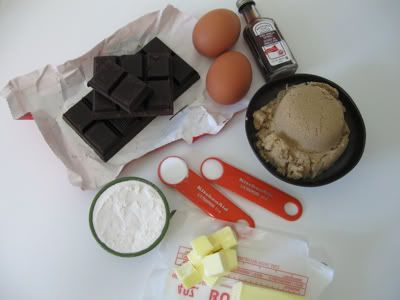
I've gotten into the habit of measuring out all my ingredients ahead of time. It's something I learned in my pastry-kitchen working days because we would work with some time-sensitive step-by-step recipes, so having all the ingredients ready and on-hand made it much easier. It's a good idea so that you're not shuffling around your kitchen looking for last minute ingredients, but measuring everything ahead of time certainly isn't necessary for every recipe. It does make for a nice picture though!

Double Chocolate Cookies

1/4 cup all purpose flour
1/2 teaspoon baking powder
1/4 teaspoon salt
8 ounces semisweet chocolate, chopped
2 tablespoons unsalted butter
3/4 cups (packed) brown sugar
2 large eggs
1/2 tablespoon vanilla extract
Flaky sea salt for sprinkling (optional, but recommended!)

Combine flour, baking powder and salt in small bowl; whisk to blend.
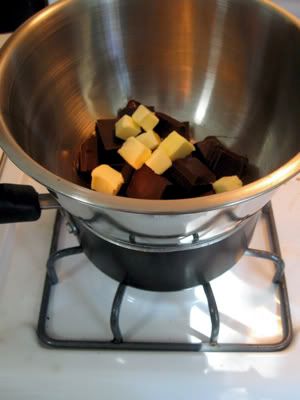
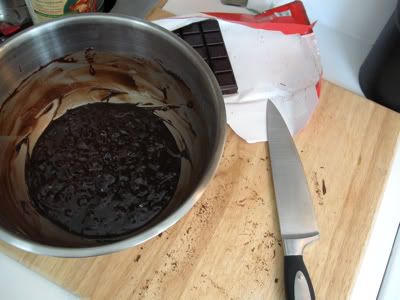
In another bowl stir the chocolate and butter over a double boiler (picture below), until the mixture is melted and smooth. Remove bowl from heat and set aside to cool.
Beat sugar and eggs in another bowl until thick.
Add the chocolate mixture and vanilla extract and beat until combined.
Stir in flour mixture until combined.
Batter will be wet - chill batter until firm, at least an hour. If you plan on leaving it in there overnight, I suggest taking the batter out of the fridge about an hour before you intend to bake the cookies; it's too hard and unworkable otherwise.

Preheat oven to 350°F.
Drop batter by spoonfuls onto sheet pans, (or use a cookie scoop, like I do) spacing two inches apart. Sprinkle each with a pinch of flaky sea salt, if you’re using it.
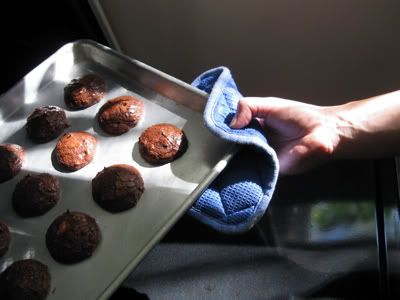
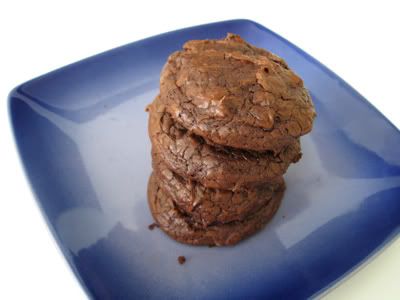
Bake just until tops are dry and cracked but cookies are still soft to touch, about 12 to 15 minutes.
Cool on sheet pan then transfer to wire rack. (They taste 10x better once cooled!!! Trust me.)


You can buy a double boiler, but why waste your money when you can achieve the same thing with a bowl set over a pot of boiling water? You're just looking for indirect heat, people! In theory, you could melt it all down in a microwave too. But where's the fun in that?


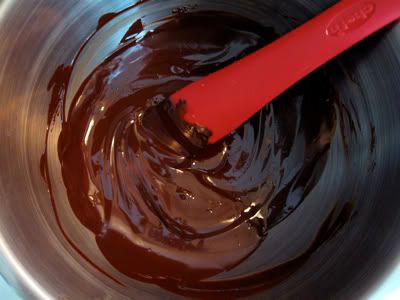
This is what your chocolate and butter should look like once combined using whichever method you prefer.


Now beat those eggs and sugar! Add those other ingredients!


(I also added chocolate chunks to mine, because I'm indulgent like that)


By the way, THESE ARE SUPER DUPER MESSY!!! (Don't say I didn't warn you!)


Finally! Now the true test of patience begins.


Oh. My. Cookies.


Another happy baker shot! Might have to take one for all cookie recipes :)